Pt. 1: Introduction & Final
For this project, I wanted to create my own app concept and create a clickable prototype for that app. I decided to go with the idea of a movie recommendation app called ClickBait.
The main feature is that it creates recommendation lists for users with movies and shows that the user is likely to enjoy. The recommendations are accurate due to extensive data collection through surveys and the user’s previous ratings of movies they have watched.
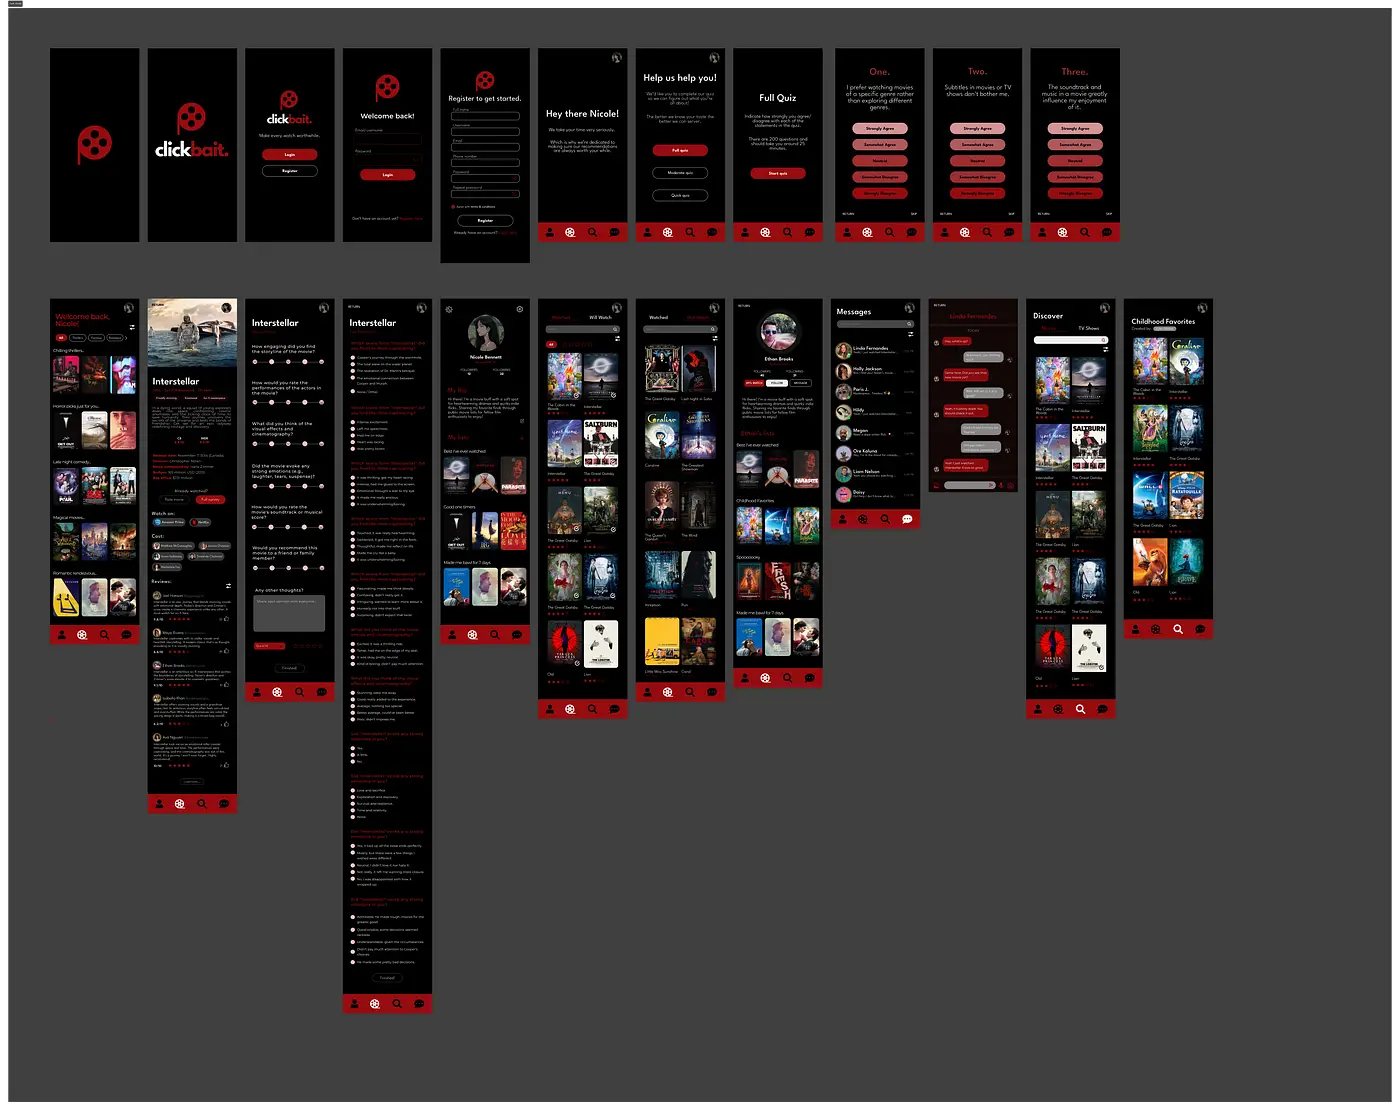
Here are the final high-fidelity wireframes for the app:
Onboarding (light mode)
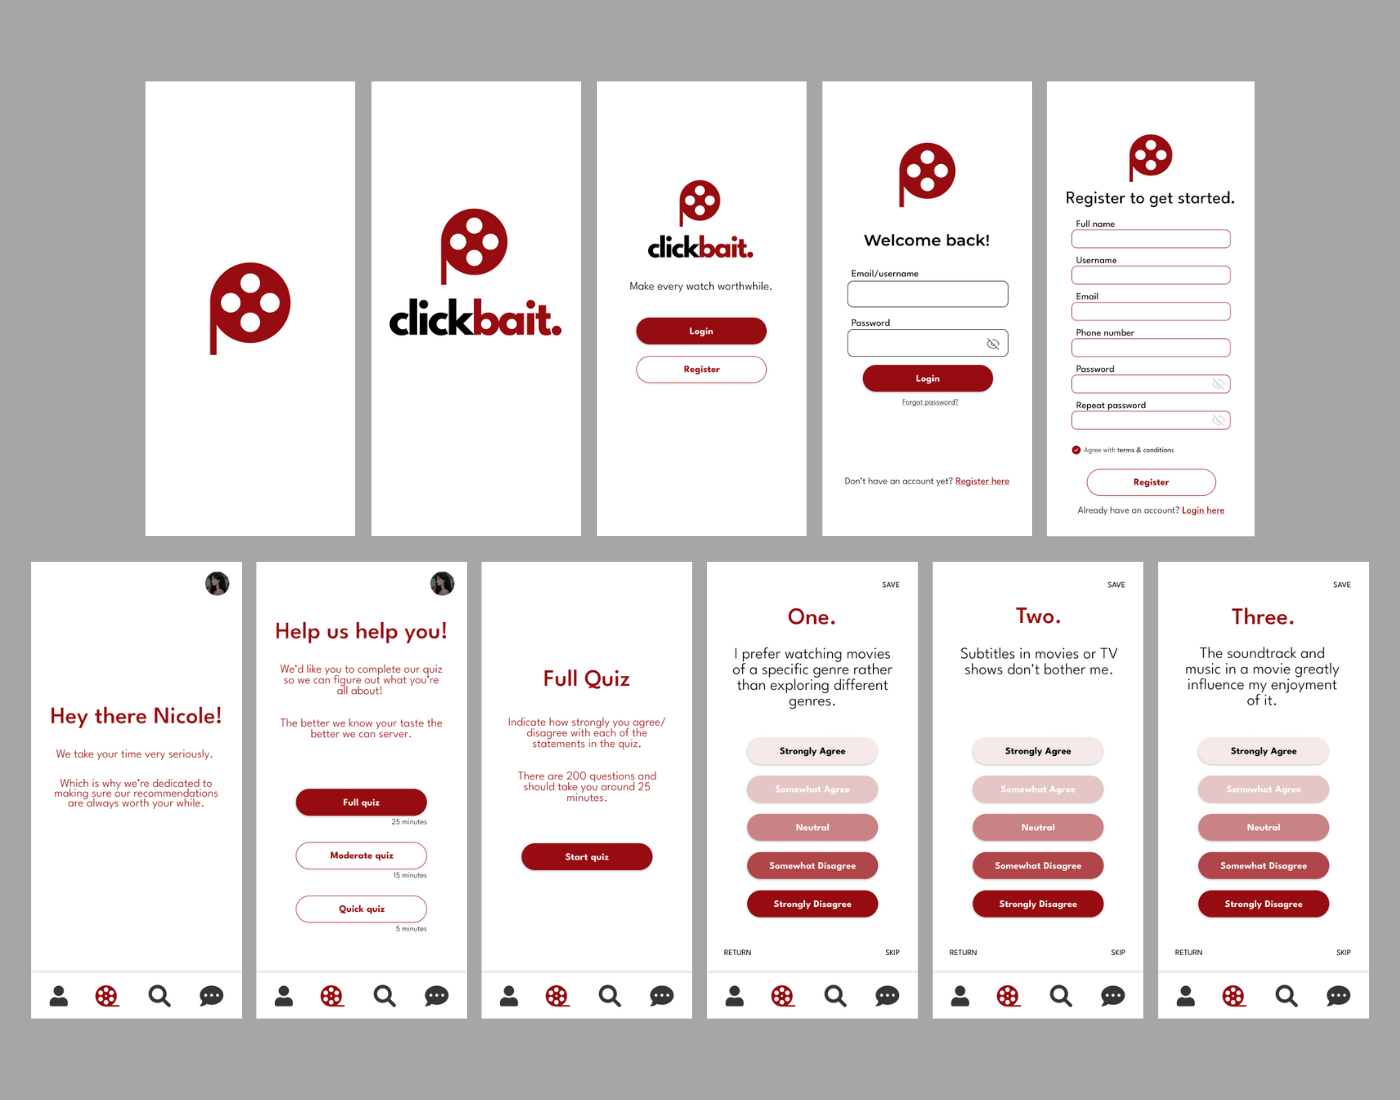
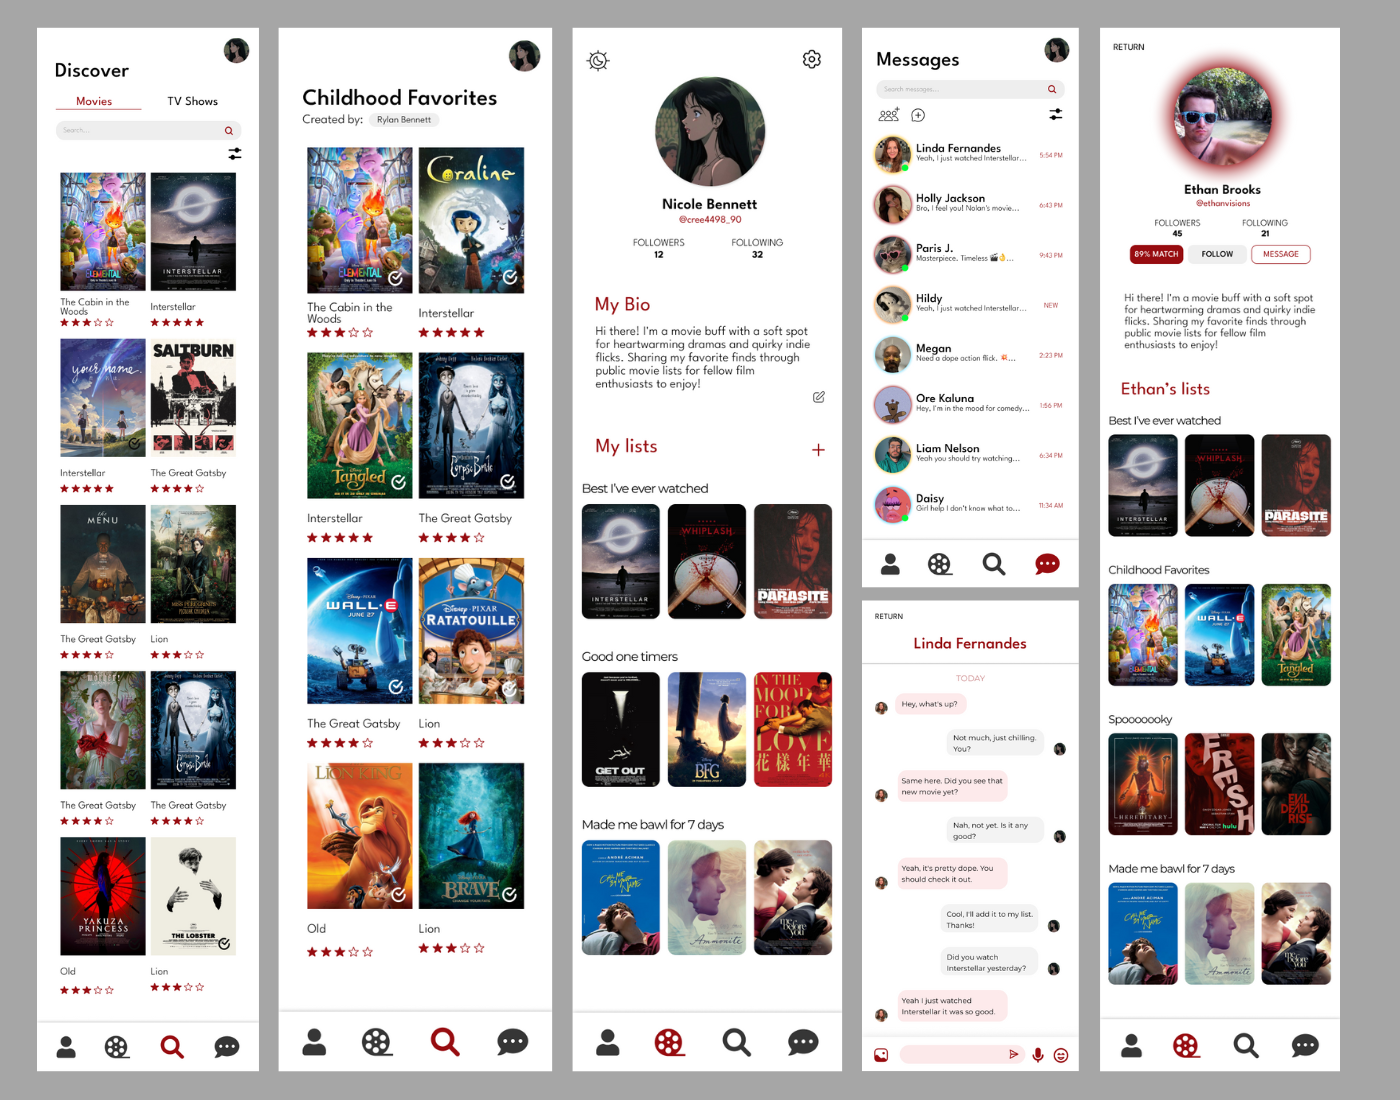
Discovery (light mode)
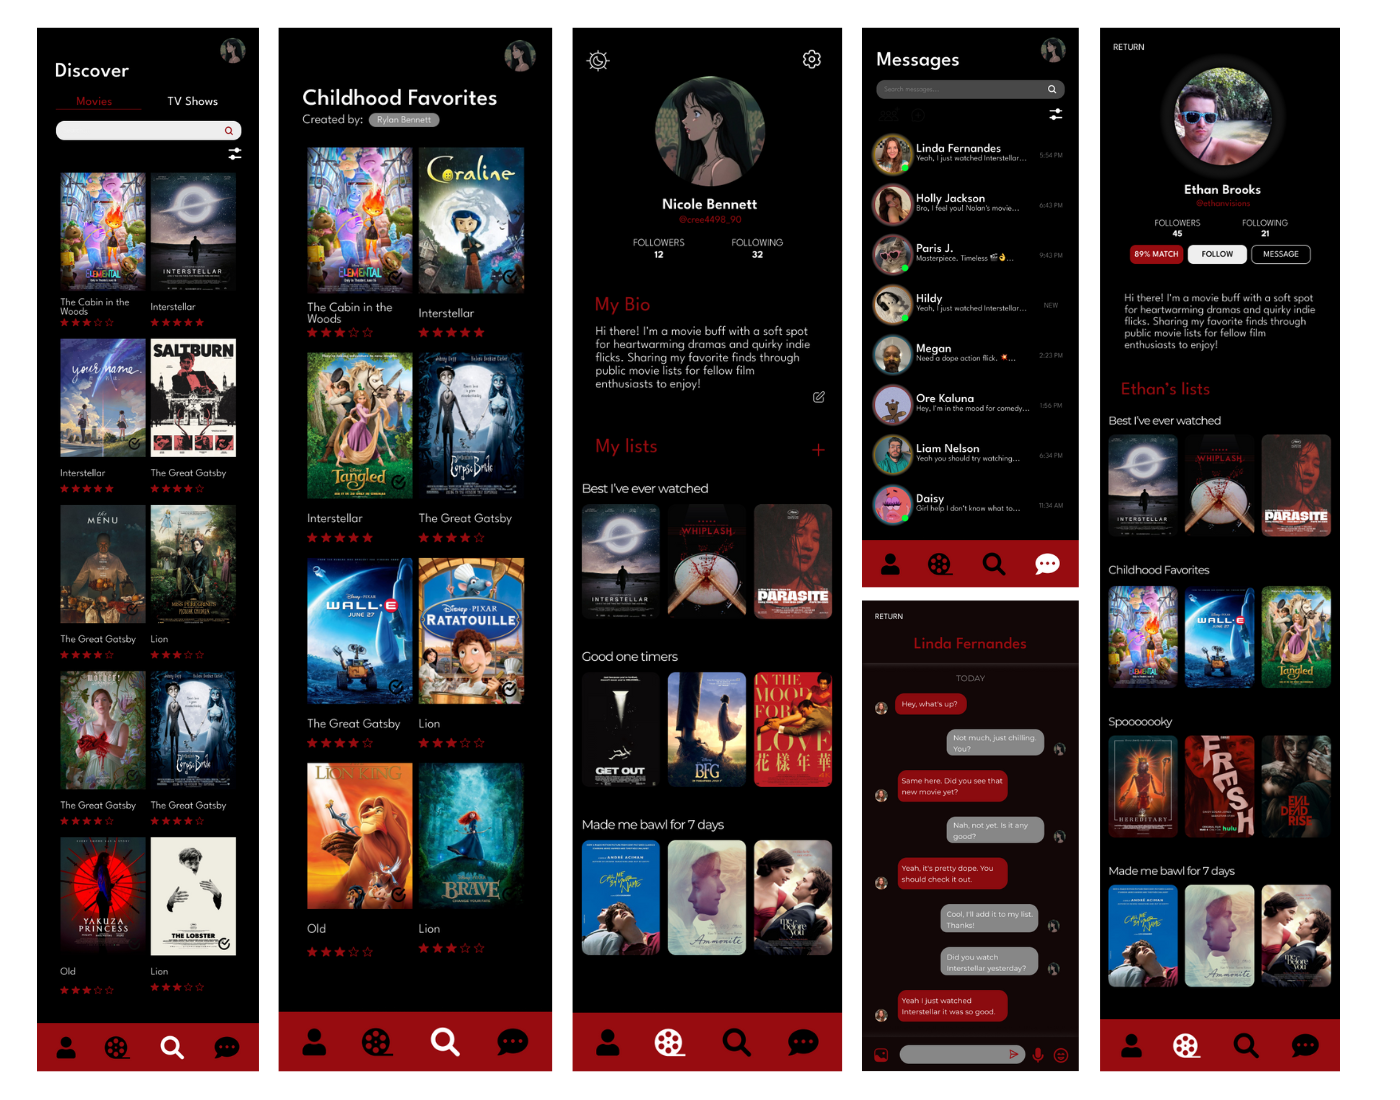
User interactivity (light mode)
Onboarding (dark mode)
Discovery (dark mode)
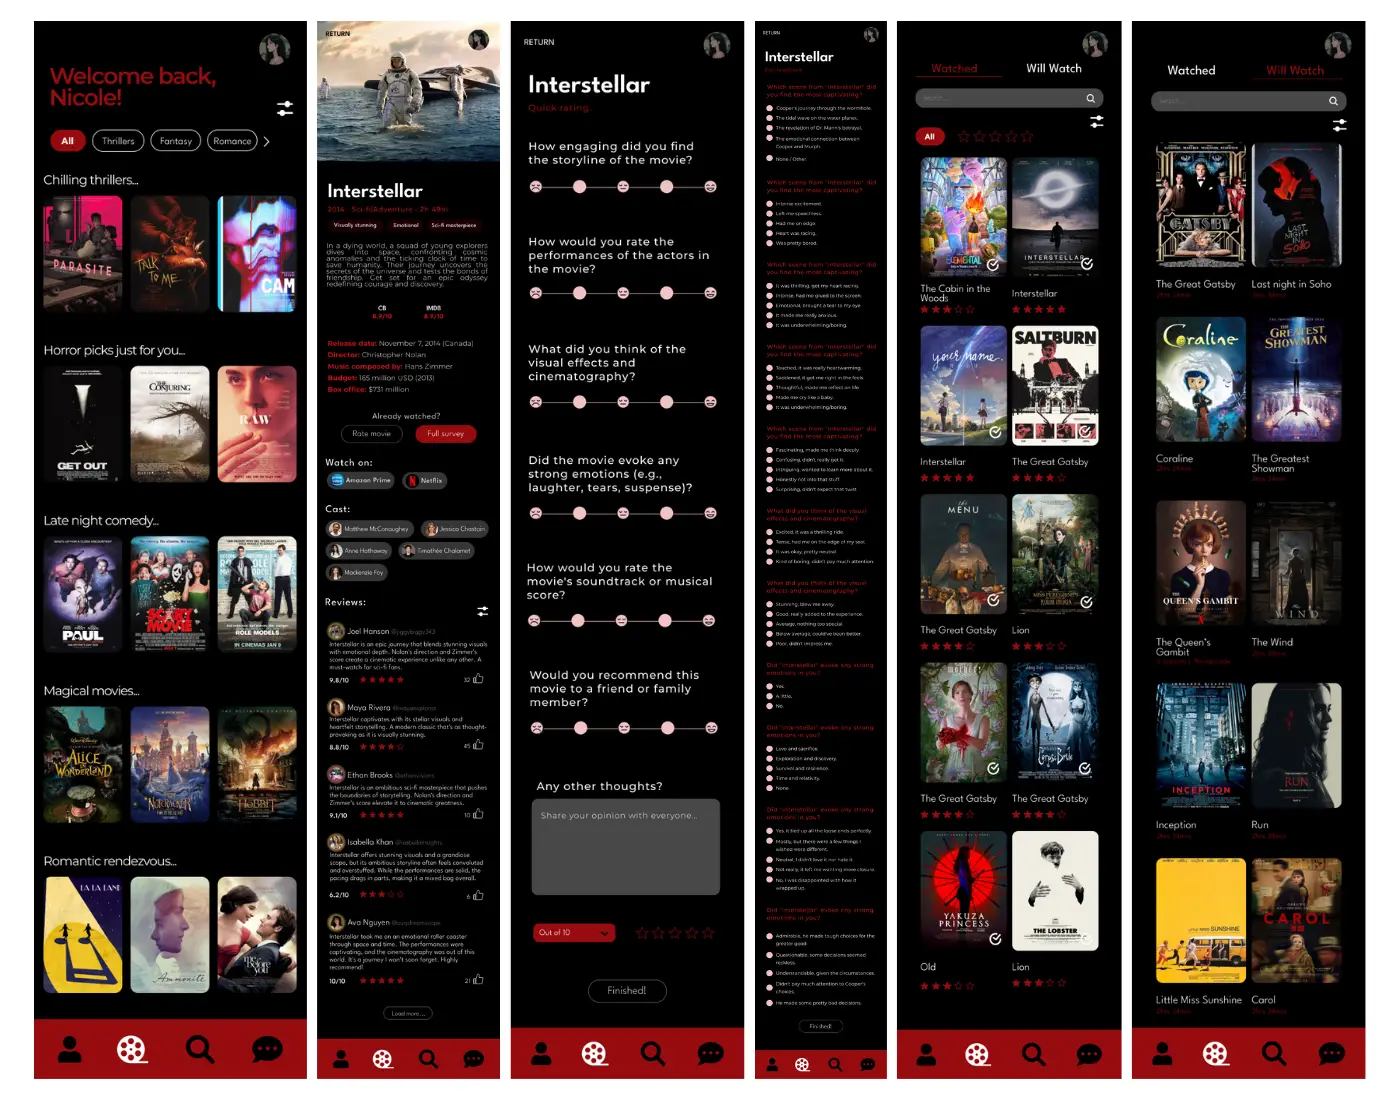
User Interactivity (dark mode)
Here is a walkthrough of the clickable app prototype:
Technology used:
- Figma — was used to create the wireframes and the final prototype
- Photoshop — was used to create the logo
Now I’ll go over the process of how I got to my final products and walk through my creative process.
Pt. 2: UX Research
To ensure ClickBait delivered truly personalized recommendations, I began with extensive user research. The goal was to understand how people currently discover movies, what frustrates them about existing platforms, and what features they actually value in a recommendation tool. This research shaped every design and feature decision moving forward.
Pt. 3: Feature Ideation
Here are the main features that I wanted to include in my app concept:
- Personalised Movie Lists — users will be able to complete extensive quizzes and surveys, both related to their personalities and their movie preferences to create personalised movie recommendations. Users can also answer questionnaires about movies they have previously watched, giving their opinion about specific scenes, characters and themes within the movie/show to contribute to their data. This data will be extremely extensive and all of the user’s recommended lists will be based on this data.
- Group Movie Lists — users can create group lists (movie recommendations that are created according to the preferences of all members in the group) with their friends. In this case, the app takes the preference data of all members of the group and suggests content that all members of the group are likely to enjoy to enhance the experience of watching movies with other people.
- Personal Ratings — users can extensively rate all the movies they watch and save their ratings to their profiles. This data can optionally be shared publicly or can act as a personal private rating system that users can refer back to.
- Personal Lists — users can create their own lists of movies they have already seen to categorise and organise their movies on their profile. Their profiles can be public so other users can access their lists too.
- Movie information — users can view information about movies such as title, cast, director, genre, themes, plot, where to watch etc.
- Public ratings — users can see other people’s ratings and comments when they search for movies. They can also filter the ratings to see what users who have similar preferences to them have to say about the movie.
- Community — users can follow other users and view each other’s public lists etc. They can also see which users have preferences similar to theirs (this information should be displayed next to the profile name of different users) and users can use that as a factor when reading reviews etc.
- Chat feature — users also have the option to chat with other users regarding movies/shows. It gives users the opportunity to connect with other people who share their preferences when it comes to movies/shows.
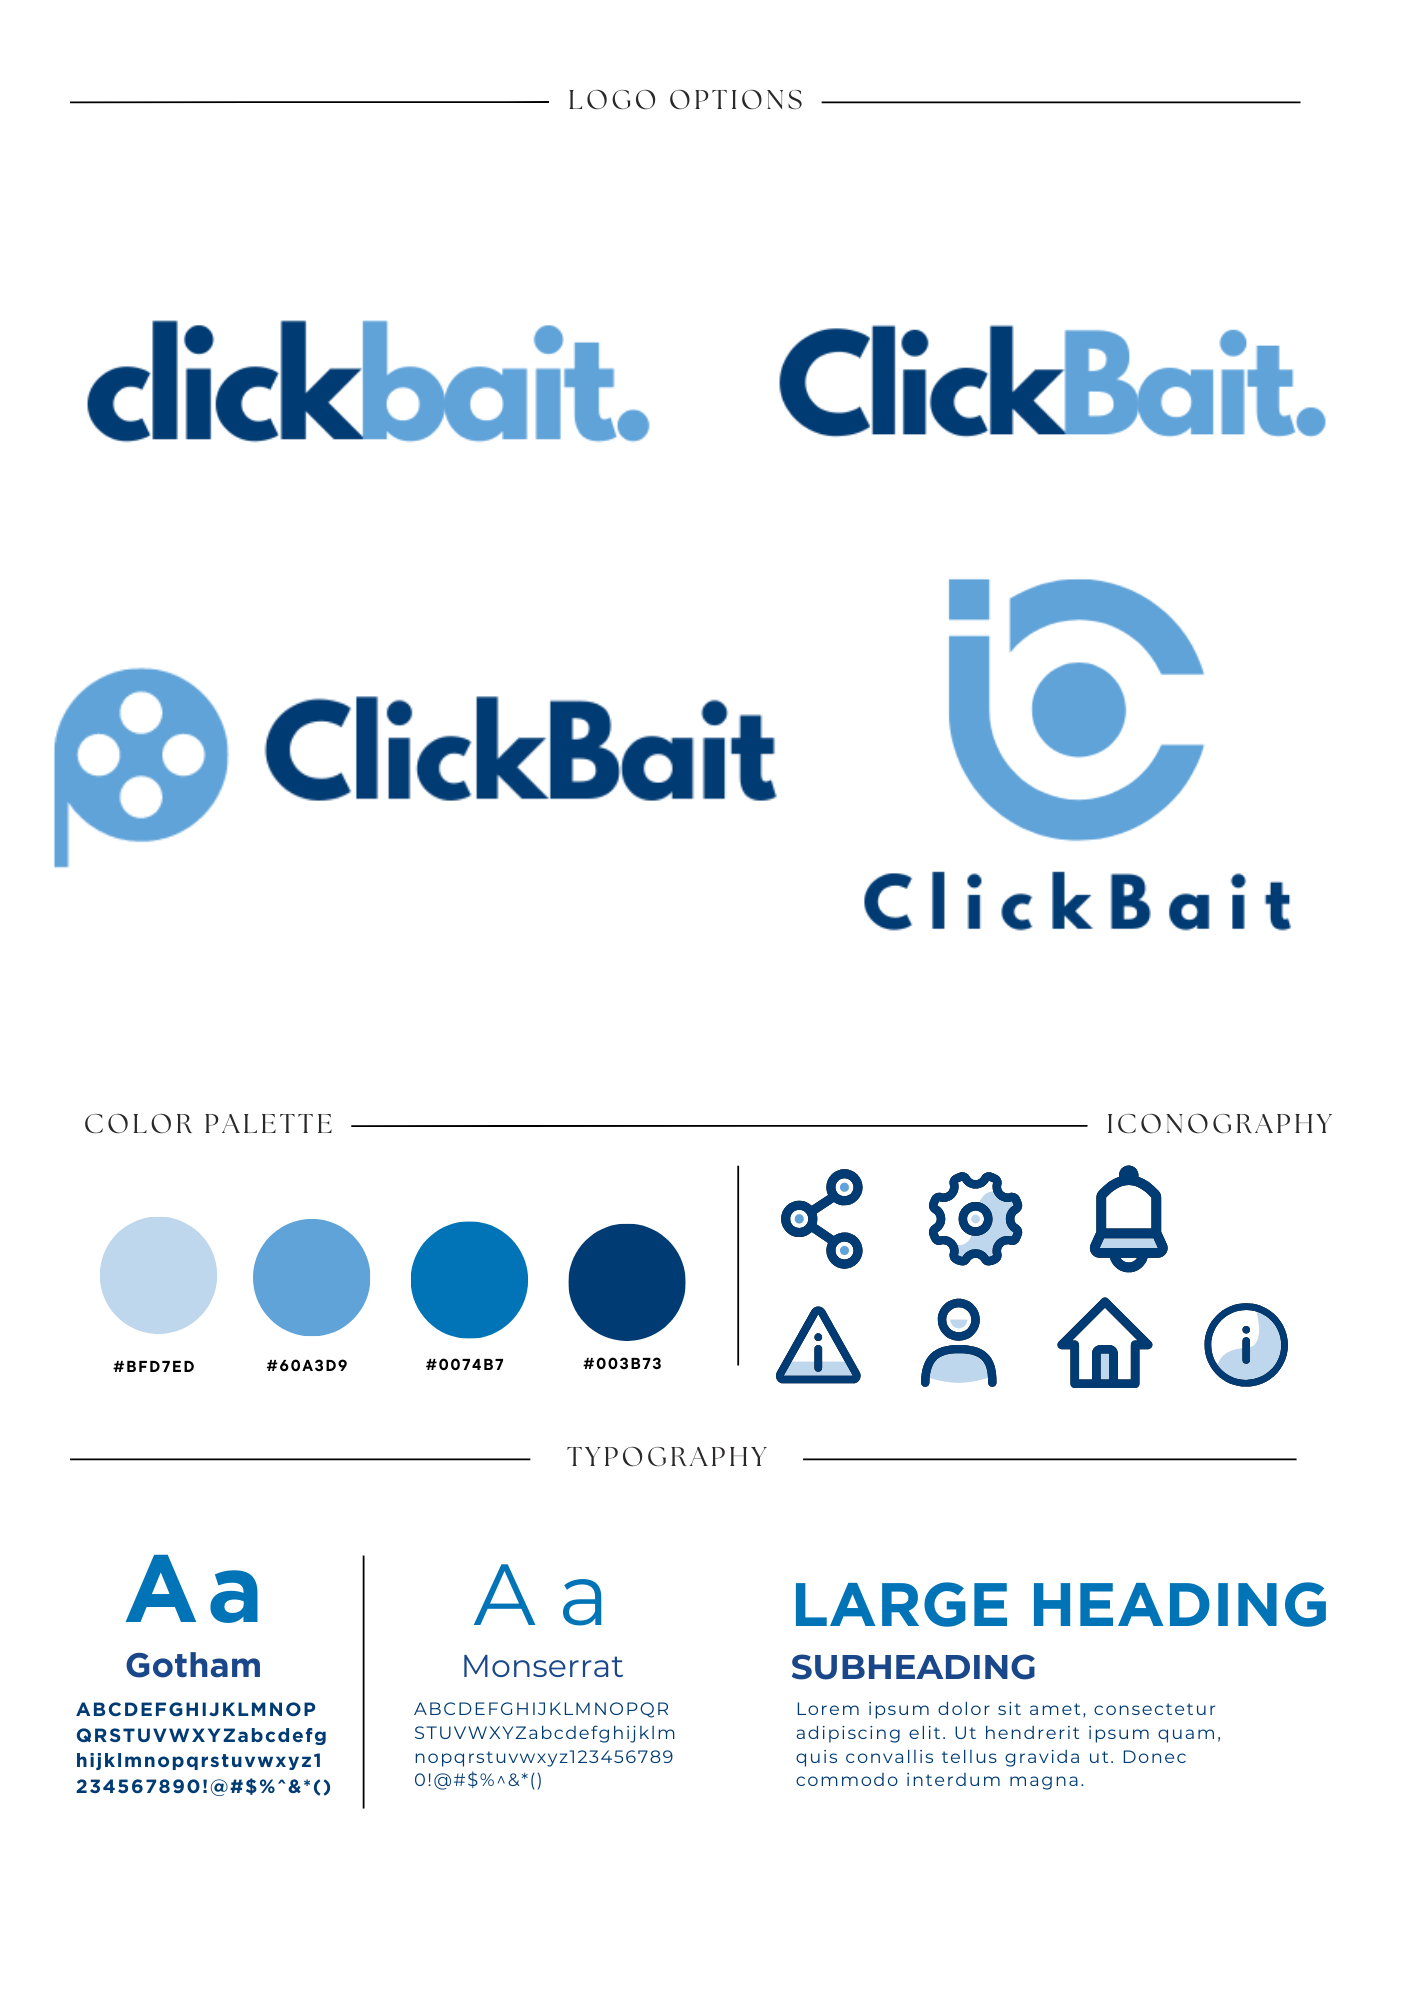
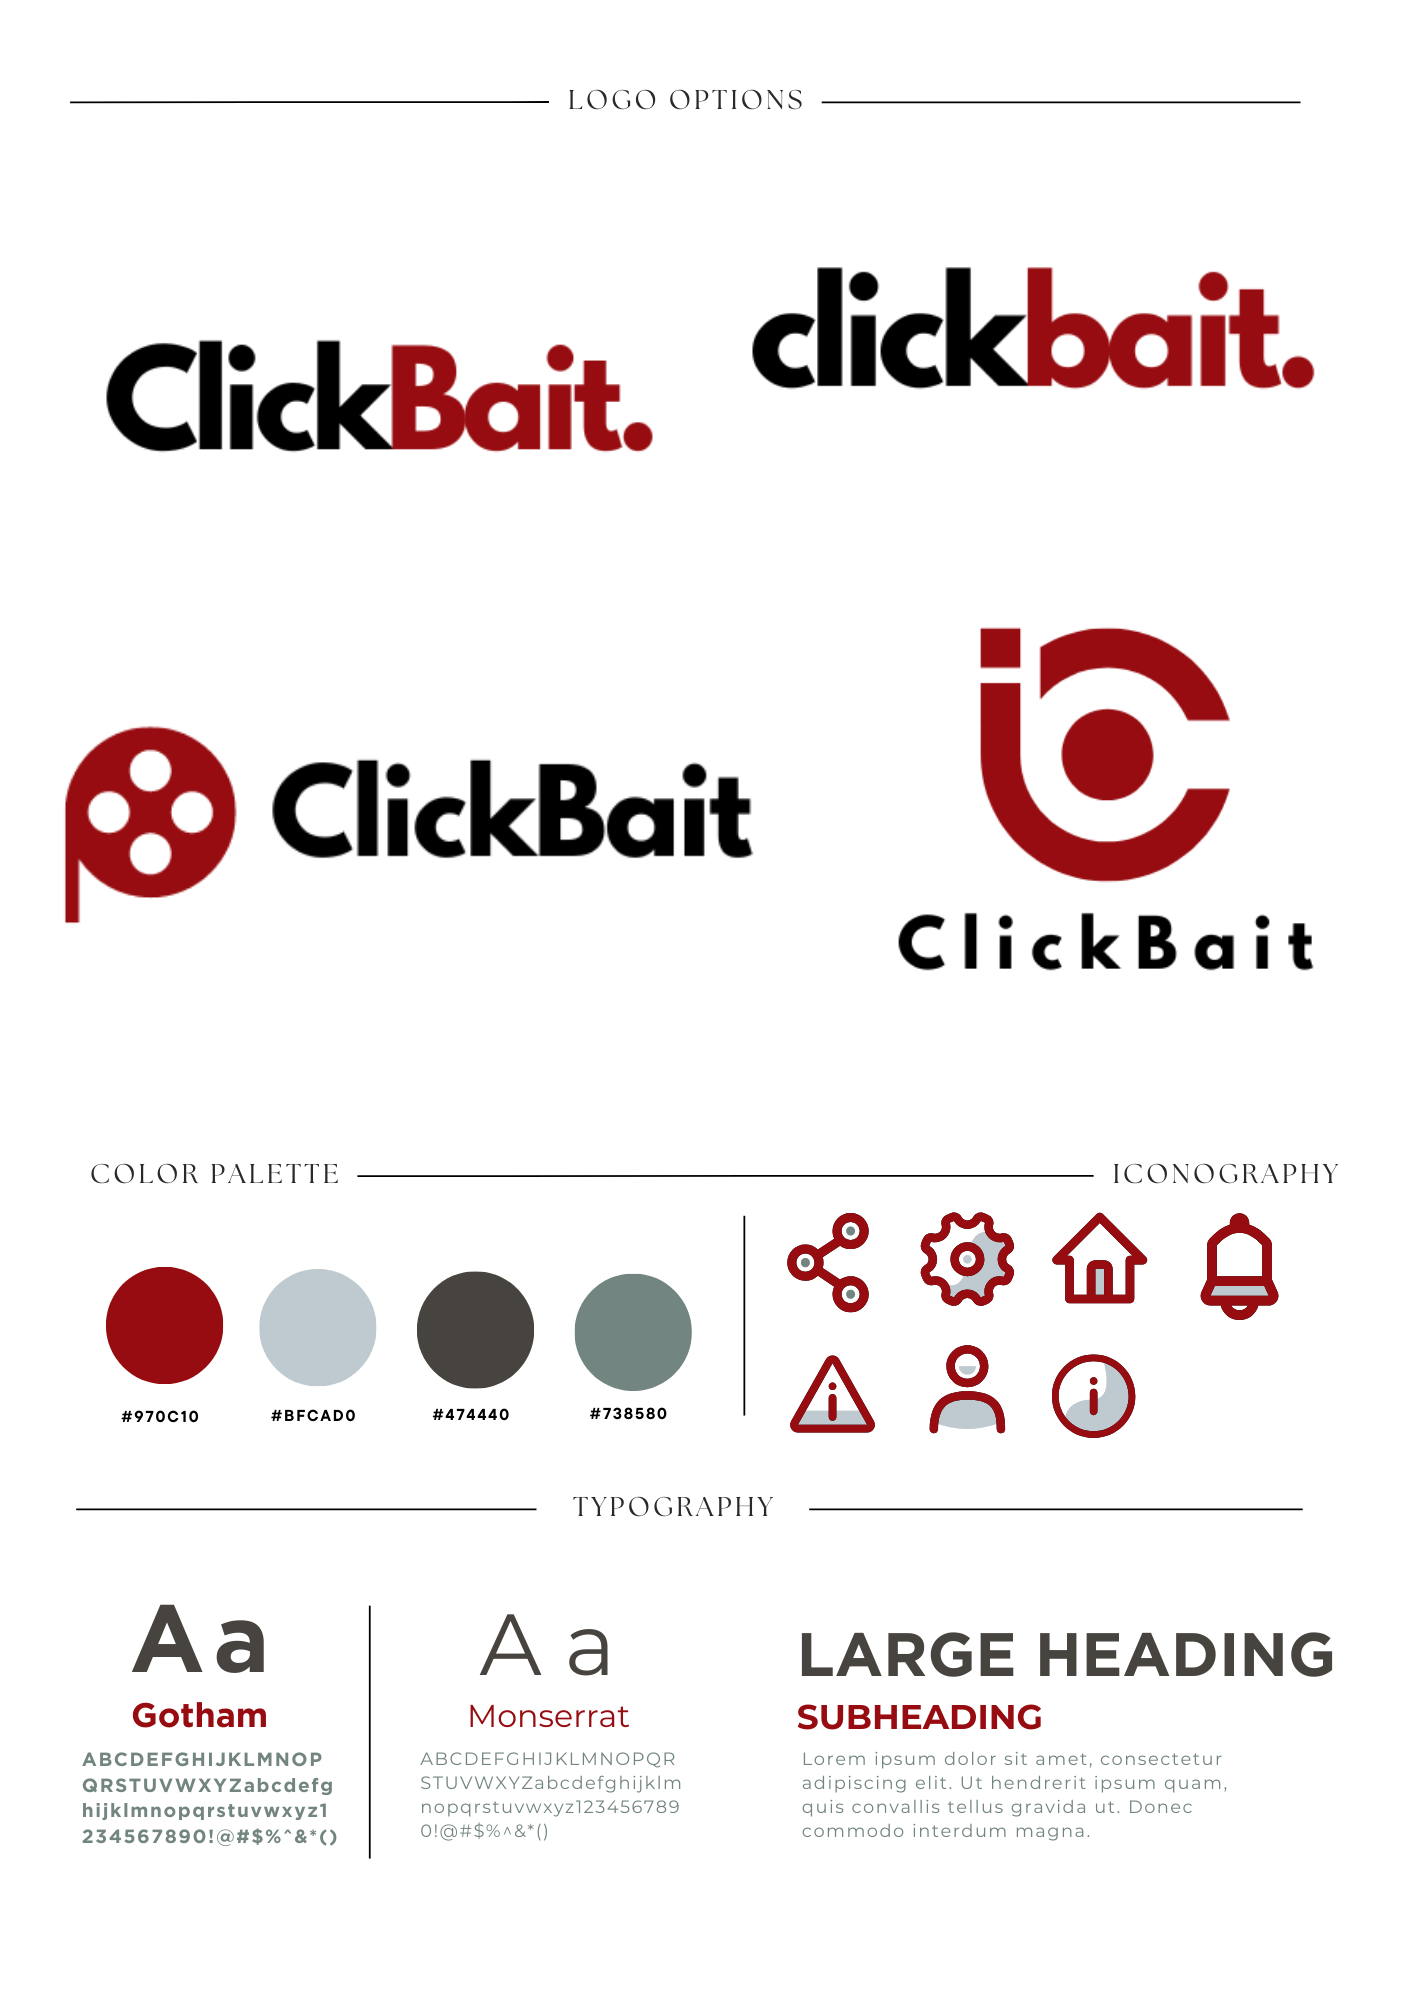
Pt. 5: Style Tiles
Then I created 2 different variations of style tiles to explore different logo concepts and colour palettes. While I liked the blue, the red and black are traditionally associated with cinema, passion and entertainment whereas blue is more commonly used STEM fields.
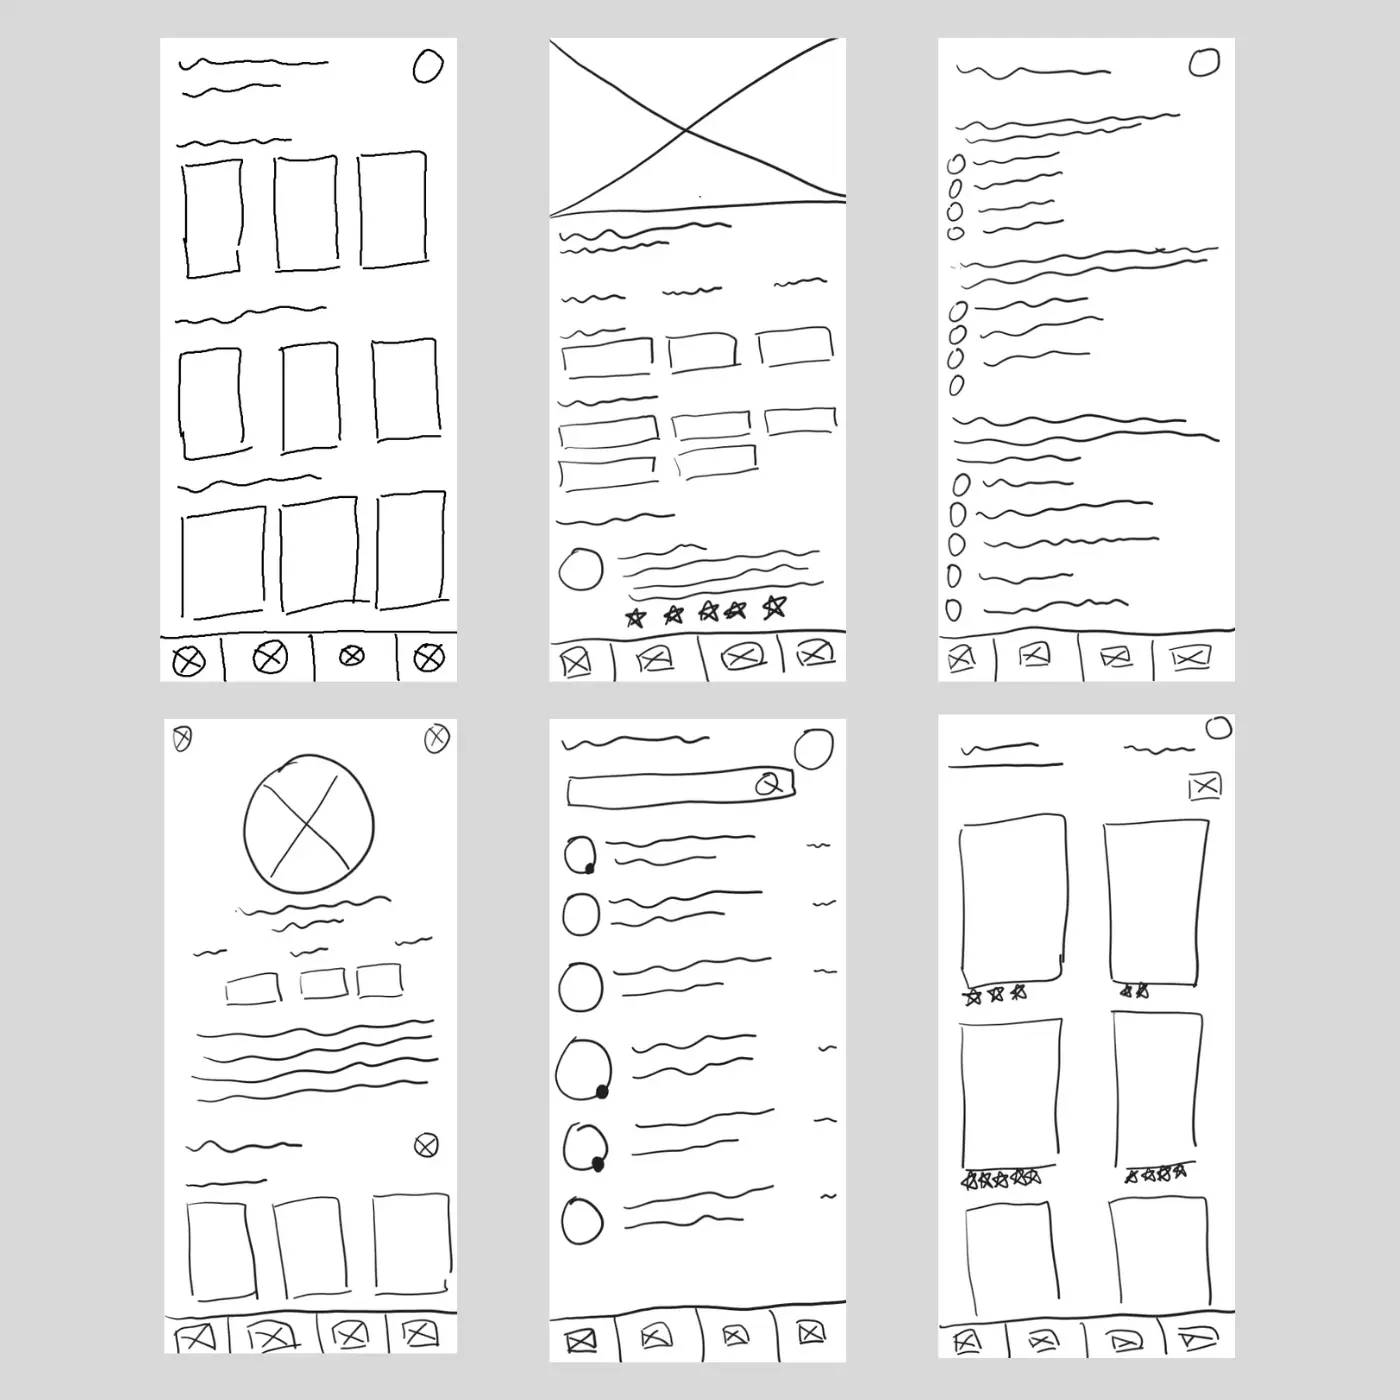
Pt. 6: Rough sketches
I started the designing process by creating some rough sketches to try and get a general overview of how I wanted to lay out all of the different features and elements of my application.
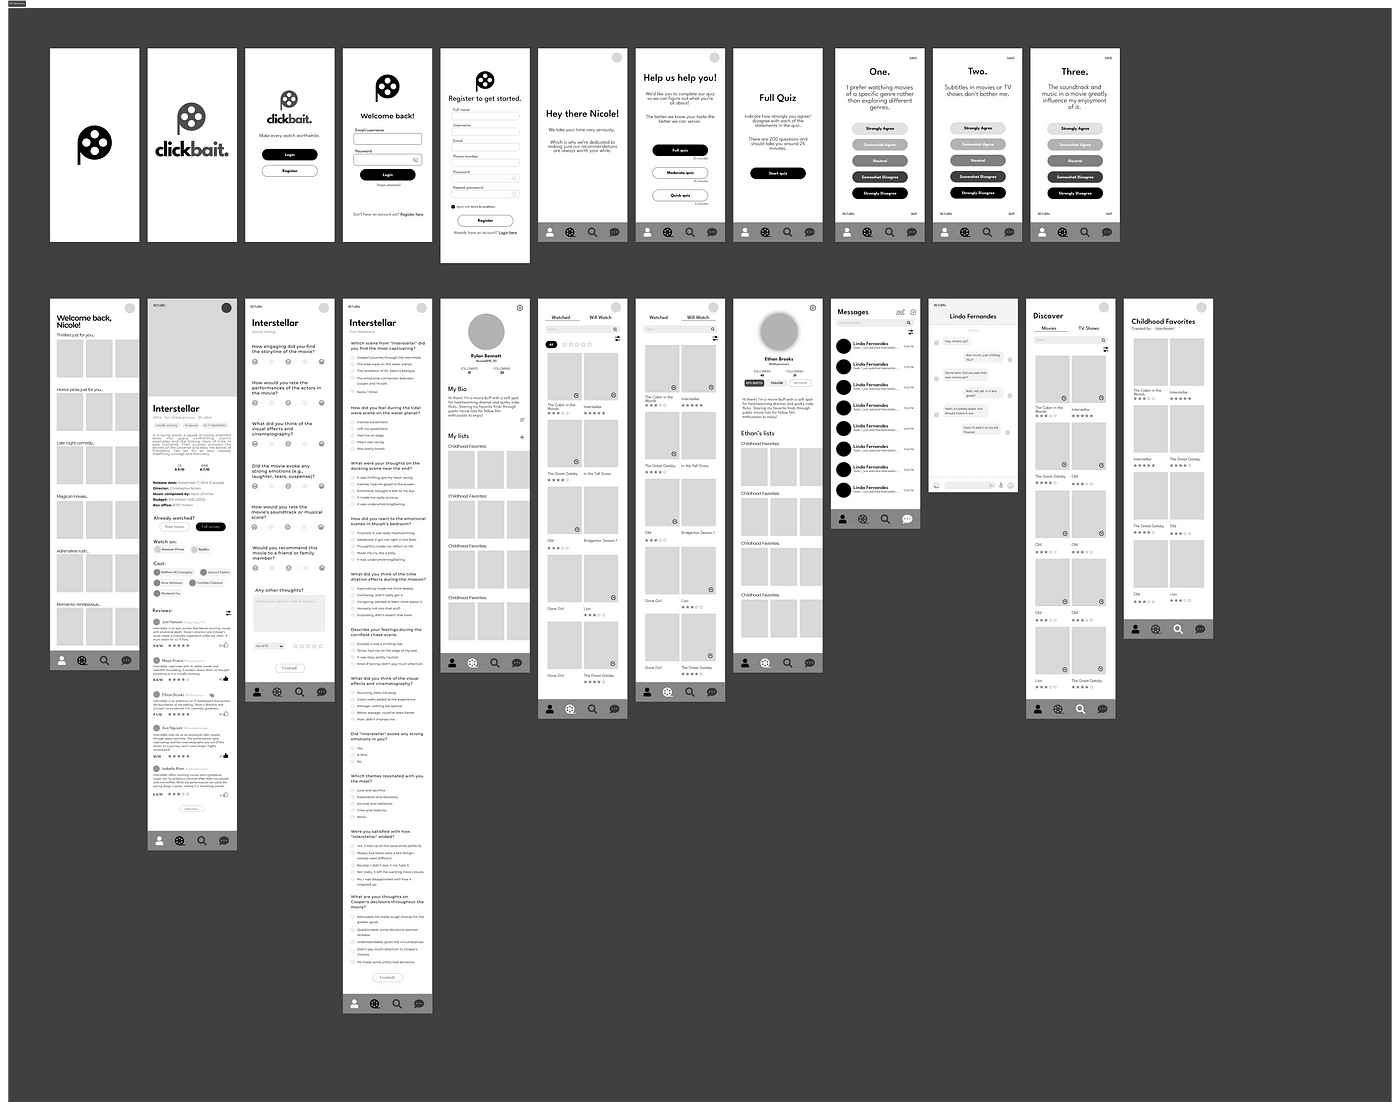
Pt. 7: Mid-fidelity wireframes
Then I moved on to Figma and created a set of low/mid-fidelity wireframes to get a better visual af how all of the elements would look. I also continued expanding on the different features of the app and started getting specific with the technicalities of the app i.e. how the app collects data to recommend content to the users.
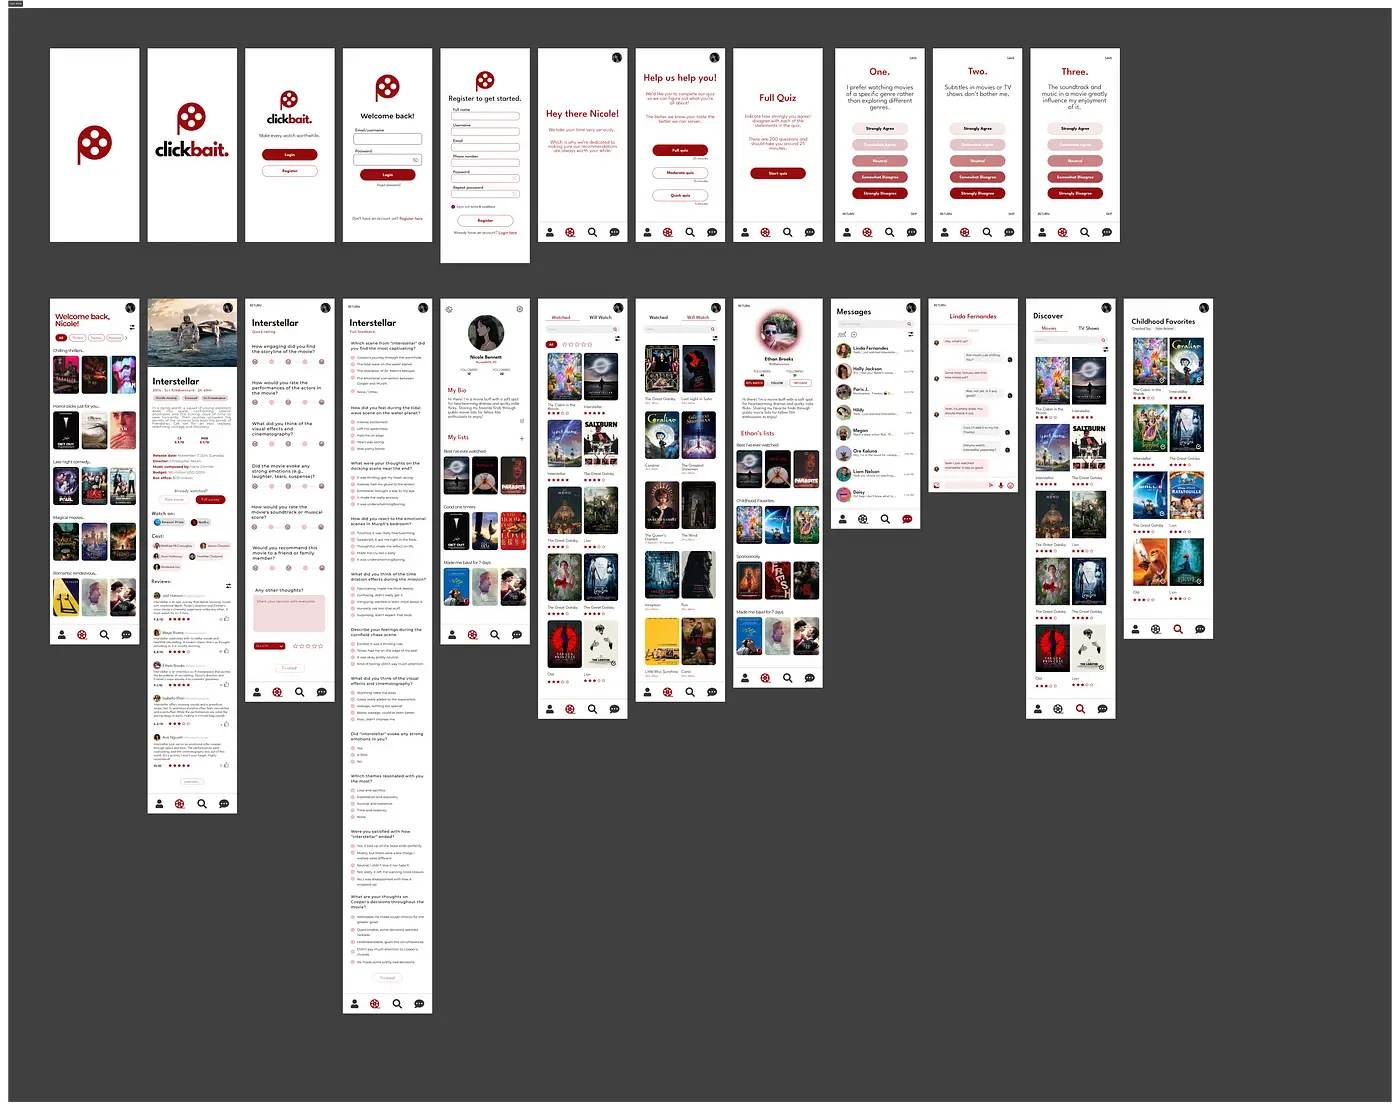
Pt. 8: High-fidelity wireframes
Finally, I worked on the high-fidelity wireframes. I created them in both light and dark mode. This is very popular with my main target users and would also give me the opportunity to explore different colour variations in my palette.
Pt. 9: Prototyping
For the final part, I prototyped my application and made it interactive to see what the whole concept would look like tied together.

Pt. 10: Reflection
This project really showed me how much I’ve grown—not just in design, but in thinking holistically about a product. I didn’t just create visuals; I had to build the entire app concept from the ground up. That meant doing all the research myself, figuring out what features made sense, and making sure every part of the experience had purpose. It was a challenge, but also incredibly rewarding. Turning raw ideas into something functional and tangible reminded me why I love doing this work.